
By default your map shows the current weather (METAR). It can also show the forecast for a few hours ahead, which is handy when planning a flight.
Open your map’s settings #
- On a phone or computer that is on the same WiFi as your map, open a web browser.
- Go to
http://<map name>.local(the name you wrote down during the WiFi setup) orhttp://<IP address>, for examplehttp://192.168.1.50. If you don’t know the IP address, see how to find the IP address of your PilotMap. Some Android phones can’t open.localnames; use the IP address there. - In the menu at the top, move the mouse over Settings and click Editor.
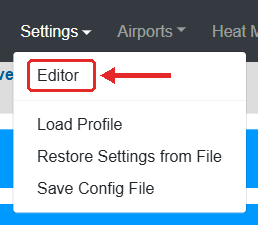
- Click a blue bar to open that group of settings.
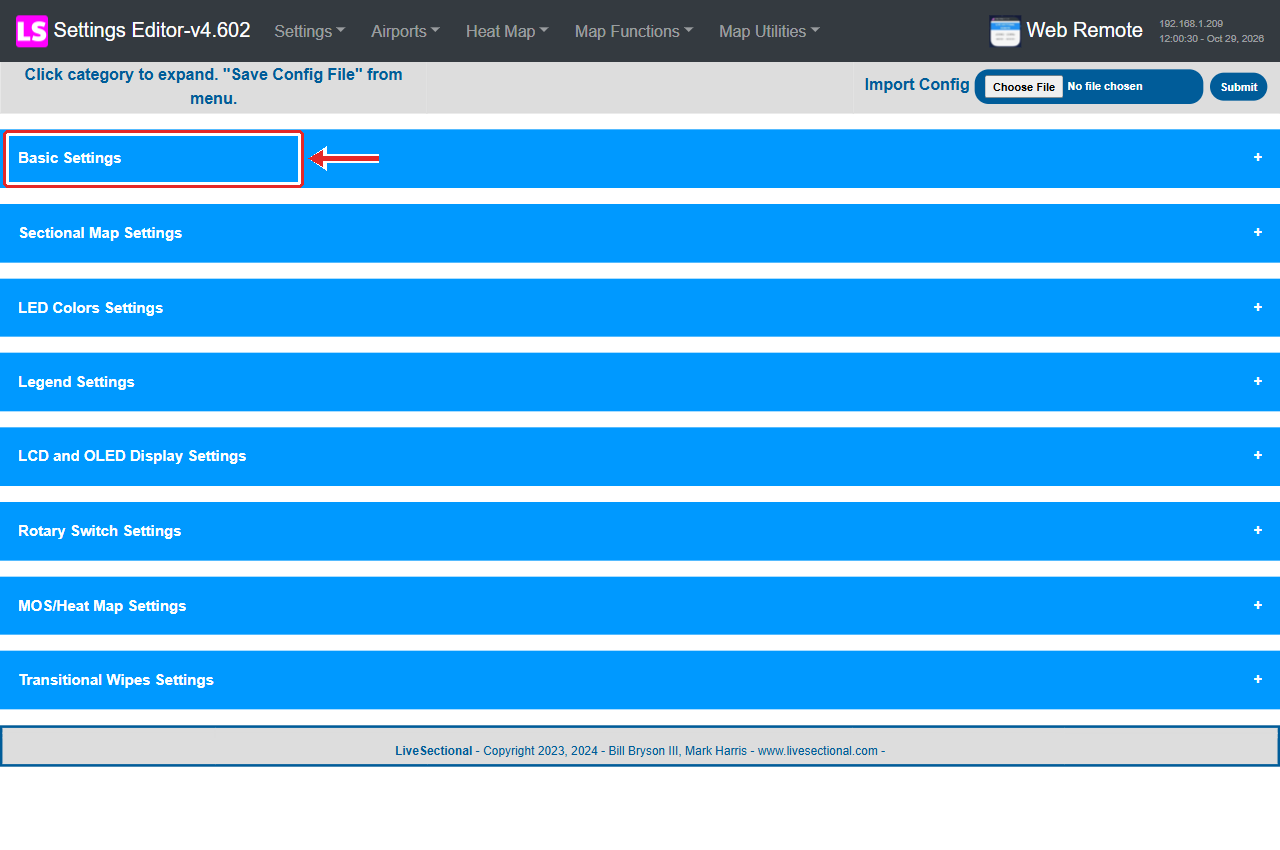
Choose what the map shows #
- Open Basic Settings.
- Choose Default Data to Display:
- METAR: current weather (normal setting).
- TAF: the official airport forecast. Only larger airports publish TAFs, so smaller airports may show as INVALID in this mode.
- MOS: a computer forecast that also covers many small airports (United States only).
- Heat Map: not weather; colours each airport by how often you have landed there. You enter the landings under Heat Map, Editor.
- For TAF and MOS, enter how far ahead in Default Data Hours Ahead to Display:
1to24hours. It is ignored for METAR and Heat Map.
Save #
- In the menu at the top, move the mouse over Settings and click Save Config File. You will see Settings Successfully Saved.
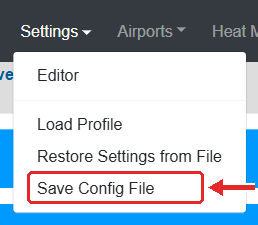
- That’s it. The map restarts its weather display by itself and shows the new setting within a minute or two. While it restarts, the legend may show all green for a moment (that is the normal “starting” status). You don’t need to unplug it.
Tip: changes are only kept after Save Config File. If you close the page before saving, nothing changes.
To go back to current weather, choose METAR and save again.


