
You can make all LEDs on your PilotMap brighter or dimmer from the map’s own web page. Nothing needs to be unplugged.
Open your map’s settings #
- On a phone or computer that is on the same WiFi as your map, open a web browser.
- Go to
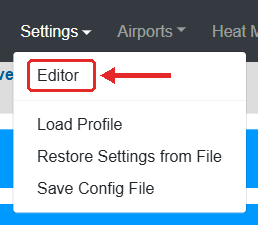
http://<map name>.local(the name you wrote down during the WiFi setup) orhttp://<IP address>, for examplehttp://192.168.1.50. If you don’t know the IP address, see how to find the IP address of your PilotMap. Some Android phones can’t open.localnames; use the IP address there. - In the menu at the top, move the mouse over Settings and click Editor.
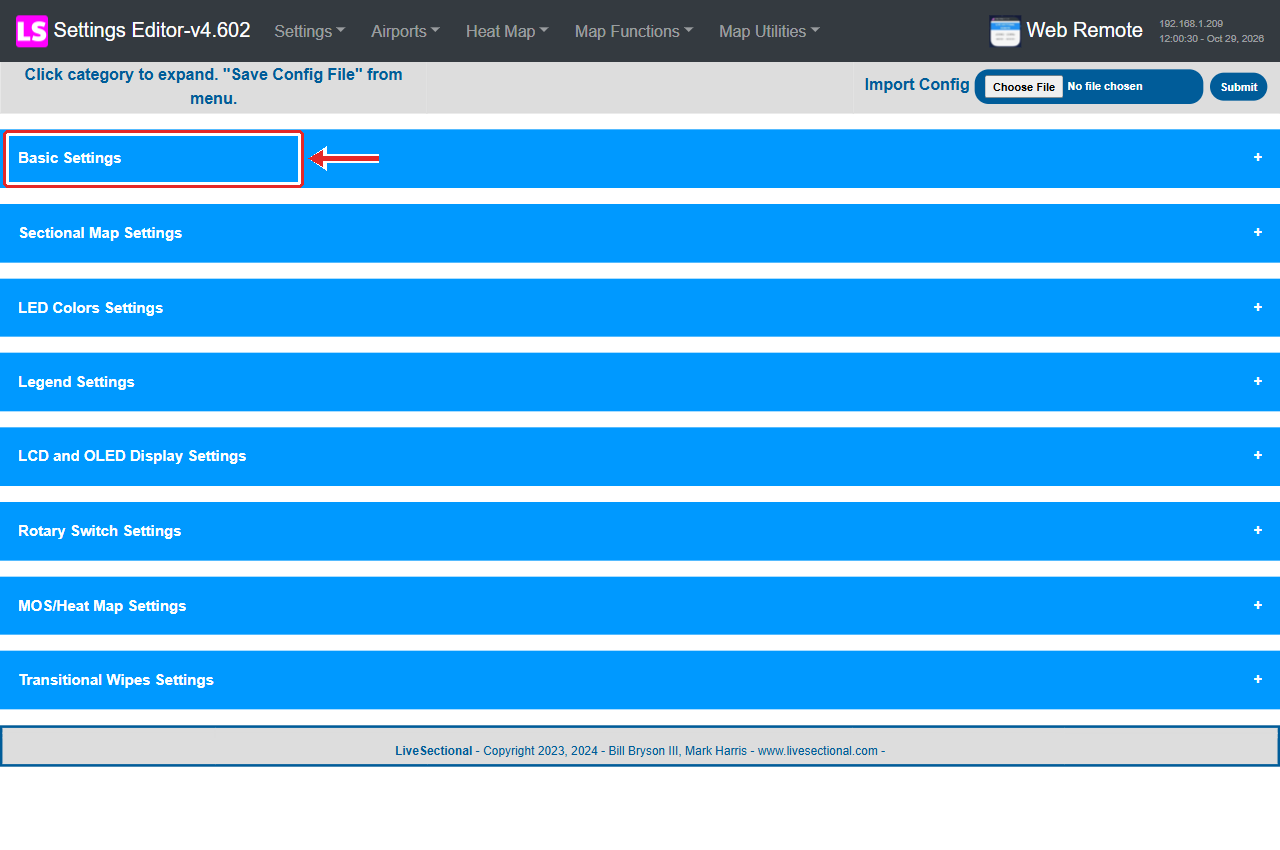
- Click a blue bar to open that group of settings.
Change the brightness #
- Open Sectional Map Settings.
- Change High Brightness. The range is 0 to 255: 255 is full brightness, lower numbers are dimmer. For a living room or office at night, values between 40 and 120 usually look best.

- Low Brightness is only used on maps with the light sensor. When the room gets dark, the map switches from High Brightness to Low Brightness by itself. If your map has no light sensor, this value does nothing and only High Brightness counts.
Save #
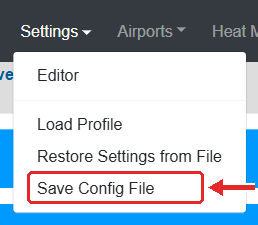
- In the menu at the top, move the mouse over Settings and click Save Config File. You will see Settings Successfully Saved.
- That’s it. The map restarts its weather display by itself and shows the new setting within a minute or two. While it restarts, the legend may show all green for a moment (that is the normal “starting” status). You don’t need to unplug it.
Tip: changes are only kept after Save Config File. If you close the page before saving, nothing changes.
Using the home airport feature? It can dim all other airports so yours stands out, see how to highlight your home airport.


